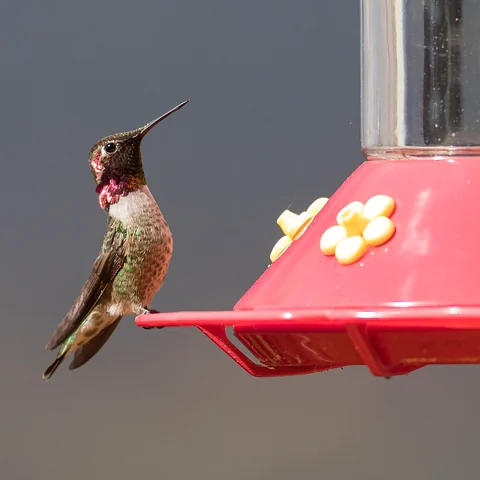
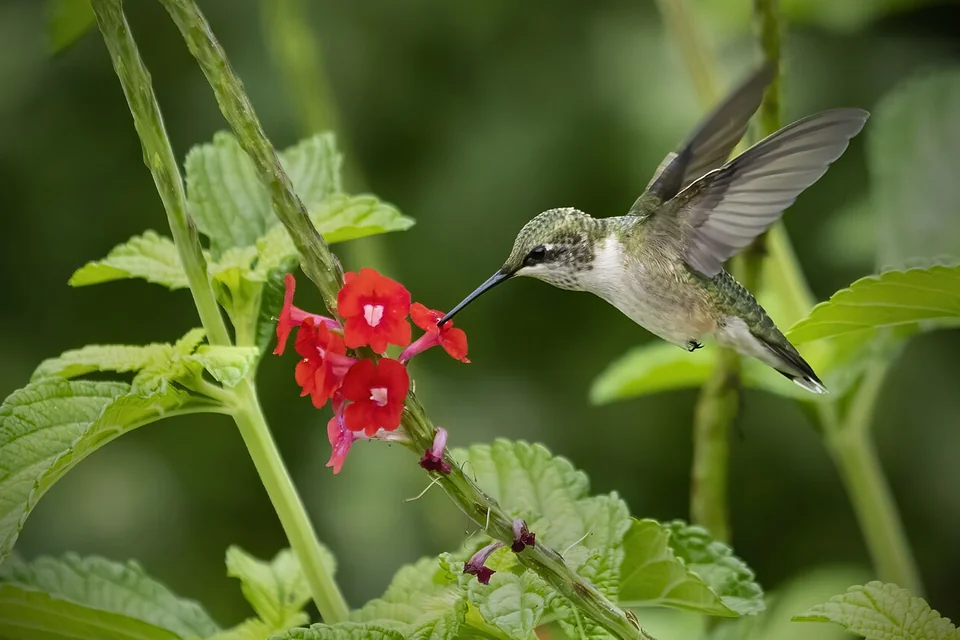
Photo: Jack Nevitt · Ruby-Throated hummingbird on red flower.jpg · CC BY-SA 4.0. Cropped, gently adjusted, and resized for this guide.
The short answer
Mix one part refined white sugar with four parts potable water by volume. Dissolve fully, cool if warmed, and use a clean feeder. Add no dye or alternative sweetener; make small batches and replace outdoor nectar on a dependable cleaning schedule.
The recipe: one part white sugar to four parts water
For everyday backyard feeding, mix one part plain refined white sugar with four parts water, measured by volume. Stir until every crystal dissolves, let a warm mixture cool, and pour a modest amount into a clean hummingbird feeder. Leave out coloring, flavorings, supplements, and alternative sweeteners. A quarter cup of sugar and one cup of water make a convenient first batch.
Start with an ordinary measuring cup and a batch small enough for your next fill. Mark any stored portion with the date and keep the mixing tools clean. Check the feeder's ports and base before pouring: a correctly measured recipe still needs clean equipment. If you repeatedly discard most of a batch, reduce the amount you make while keeping the same ratio and replacement schedule.
The Smithsonian National Zoo's recipe and Audubon's preparation instructions agree on this basic sugar-to-water ratio. We use it throughout this guide. Some older advice discusses changing concentrations under particular conditions; that is unnecessary for the routine described here. If a local wildlife specialist gives situation-specific instructions, keep those separate from your standard kitchen recipe.
Your first decision is therefore practical: how much nectar will your present visitors use before the next cleaning? With a new feeder, you do not know yet. Make the small batch, fill only part of the reservoir, and observe. Unused nectar is a reason to reduce the next fill, not a reason to keep yesterday's liquid longer.
Measure ingredients, not the finished drink
The ratio describes the volumes of the two ingredients before mixing. Measure one portion of sugar and four equal portions of water. It does not mean adding sugar to a container and topping up until the final mixture reaches four portions. Dissolved sugar changes the final volume, so those methods do not produce the same recipe.
Use the same kind of volume unit on both sides. A tablespoon of sugar goes with four tablespoons of water; a quarter cup of sugar goes with one cup of water. Do not weigh four ounces of water against one fluid ounce of sugar and assume that mixing weight and volume preserves the instruction. If your kitchen scale is easier to use, choose a separately verified recipe expressed entirely in weights rather than improvising a conversion.
| Batch purpose | Refined white sugar | Water measured separately |
|---|---|---|
| Very small trial | 1 tablespoon | 4 tablespoons |
| Small feeder refill | 2 tablespoons | 1/2 cup |
| Convenient starter batch | 1/4 cup | 1 cup |
| Two small refills | 1/2 cup | 2 cups |
| Established busy station | 1 cup | 4 cups |
These are ingredient quantities, not guaranteed final yields. Use level dry measures for the sugar and read a liquid measuring cup on a level surface. When working in milliliters, one small cup containing 50 milliliters of sugar needs four such portions of water, or 200 milliliters. That is a volume example; it is not an instruction to use 50 grams of sugar.
Write your preferred combination on a card beside the clean equipment. A visible recipe prevents accidental doubling when someone else makes the next batch.
Choose plain refined white sugar
The shopping decision should be straightforward: choose ordinary refined white granulated table sugar. The important distinction is the ingredient, not a premium package or a hummingbird picture. Read the label when a product's name leaves its contents unclear. A bag marketed as a special natural sweetener may contain something quite different from ordinary white sugar.
Do not substitute honey, brown sugar, molasses, raw sugar, corn syrup, powdered sugar, or a low-calorie sweetener. Powdered products can contain added starch, while alternative sweeteners do not reproduce the standard recipe. The Smithsonian's ingredient guidance explicitly favors refined white sugar and rejects several of these substitutions. There is no need to test a new pantry ingredient on wild birds simply because it dissolves in water.
White cane sugar and white beet sugar are both forms of refined table sugar. A package's farming claim does not by itself tell you whether the contents are fully refined white sugar. Read the actual description. If your available product is brown, flavored, mixed with another sweetener, or difficult to identify, set it aside and obtain the plain ingredient instead.
Store the sugar where it stays clean and dry. Use a clean scoop, and keep it separate from utensils carrying cooking oil, seasoning, or cleaning residue. You do not need a kitchen full of dedicated equipment, but separating feeder brushes from food-preparation utensils makes the process clearer. Label any feeder-care supplies so another household member does not mistake a brush used on outdoor equipment for a dishwashing brush.
The useful economy is buying a familiar ingredient you can identify and measure accurately. There is no benefit in adding complexity before the water even reaches the feeder.
Your visual action map

Read the visual as text
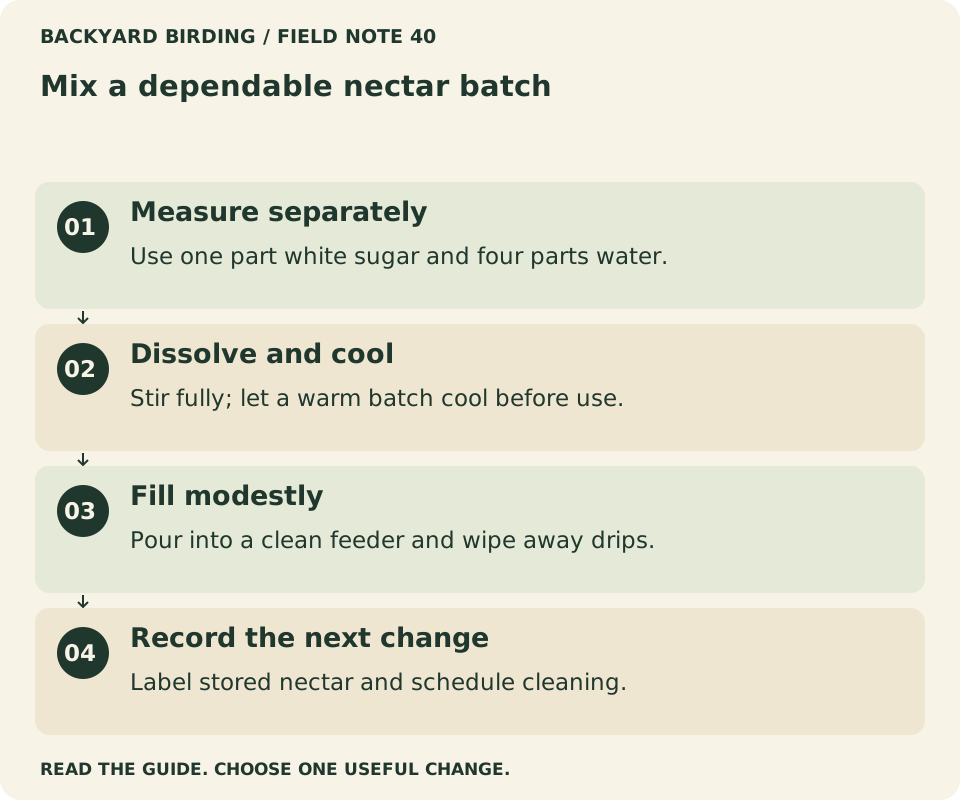
- Measure separately. Use one part white sugar and four parts water.
- Dissolve and cool. Stir fully; let a warm batch cool before use.
- Fill modestly. Pour into a clean feeder and wipe away drips.
- Record the next change. Label stored nectar and schedule cleaning.
Use water you trust for drinking
Ordinary potable tap water is suitable for the standard recipe; bottled water is not an automatic upgrade. Begin with the water quality you actually have. A local advisory, an unfamiliar private well, or a supply problem deserves attention before you prepare food for birds. Do not assume that adding sugar solves a water-quality concern.
If your household has a current drinking-water advisory, follow the issuing authority's instructions and use an appropriate safe supply. Different advisories have different causes. Boiling can address some microbial hazards but is not a universal treatment for chemical contamination. For this guide's purposes, the simplest response is to prepare nectar only with water you already know is suitable for drinking.
Collect the measured water in a clean vessel. Do not use a garden hose that has been sitting in the sun as your kitchen water source. Check that the jug or saucepan contains no grease, soap film, or residue from another task. When borrowing an old storage bottle, make sure it is food-safe and has never held a nonfood chemical; appearance alone cannot establish that history.
If you use a household filter, maintain it according to its own instructions. A filter overdue for replacement is not made dependable by the word filtered on your recipe note. Similarly, avoid adding minerals or supplements because you imagine that wild nectar must require a more complicated imitation.
This is a supplemental energy source, not a complete replacement for what hummingbirds find outdoors. Safe water and the established sugar ratio are enough for the liquid you are making. The insects, flowers, shelter, and space in the surrounding yard belong to a broader habitat plan.
Decide whether warming the water helps your routine
You can dissolve the sugar in potable room-temperature water. The Smithsonian does not require boiling for its recipe. Audubon describes a preparation using boiling water, followed by cooling. These are different kitchen methods for reaching a fully dissolved mixture; they do not mean that a feeder filled from a boiled batch stays sterile outside.
Warm water can make stirring easier. If you choose that method, heat the water safely, measure the required amount, and add the measured sugar. Avoid a long uncovered simmer after measurement, because evaporation reduces the amount of water remaining. The aim is to dissolve the sugar, not to make syrup by concentrating it over heat.
Keep the container on a stable surface, away from children and pets, while it cools. Do not pour hot liquid into a feeder unless its manufacturer specifically allows it, and never hang the feeder with hot nectar available to birds. A glass reservoir can also have handling limitations when temperatures change suddenly. Follow the equipment instructions instead of treating every feeder material alike.
For a room-temperature batch, stir and inspect the bottom of the container. Persistent crystals can mean you have not mixed long enough or have measured incorrectly. Check the quantities rather than adding an unmeasured splash of water. A transparent mixing jug helps you see whether sugar remains, especially along the bottom edge.
Choose the method you can repeat without confusion. Someone making a tablespoon-sized batch may prefer room-temperature mixing; someone already heating drinking water may find a cooled warm-water batch convenient. Either way, fresh preparation must be followed by clean equipment and timely replacement.
A dependable preparation sequence
Set the clean feeder, measuring utensils, sugar, water, and storage container on a clear surface before starting. Read the quantity you intend to make. This brief pause is especially useful if you usually prepare a larger batch: habit can turn a quarter cup into a full cup before you notice.
Measure the water and sugar separately, combine them, and stir thoroughly. Look through the side of the container and along the bottom for crystals. If you warmed the water, wait until the mixture has cooled. Prepare a label for any portion that will go into the refrigerator, including the mixing date and the words hummingbird nectar.
Check the feeder before filling. Its reservoir, ports, seals, and lid should be clean, rinsed, and correctly assembled. Inspect removable parts on a tray so a small gasket does not disappear into the sink. A missing seal can create a leak that will later be mistaken for unusually enthusiastic feeding.
Pour in only the amount needed for the next care interval. Keep the bottle or mixing jug from touching a dirty feeding port. Wipe accidental drips from the outside of the feeder and the preparation surface. Close the reservoir as directed, then carry it upright to the mounting point.
After hanging, look for leaking around the base and ports. Check again once the feeder settles. Note the date, approximate fill level, and weather. You now have a starting observation against which to compare the next refill. That small record is more useful than assuming an empty reservoir always means birds drank everything.
For the washing procedure itself, use our separate step-by-step hummingbird feeder cleaning guide.
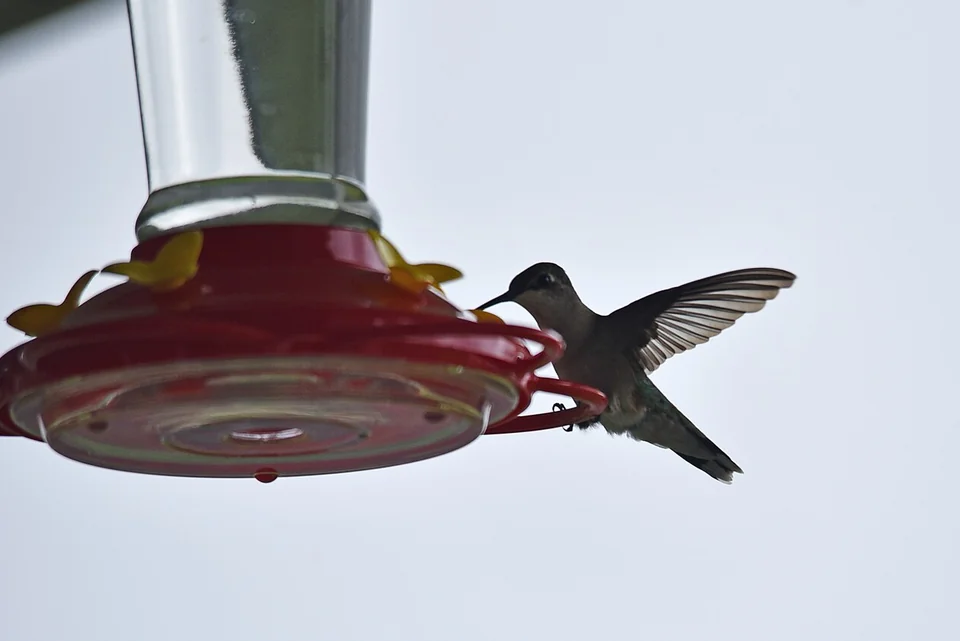
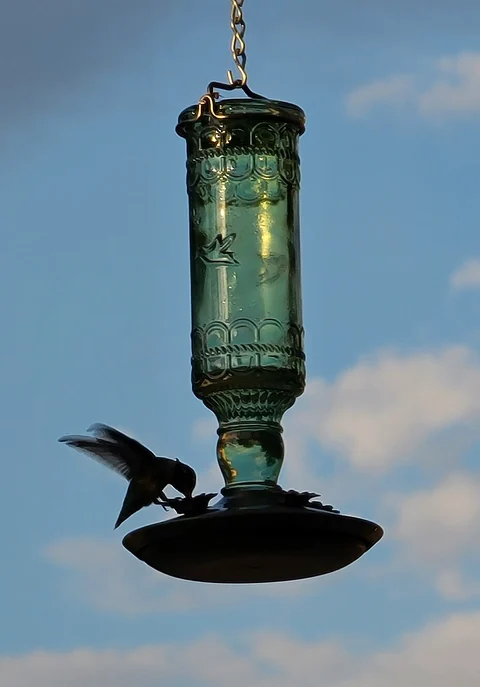
Photo: U.S. Fish and Wildlife Service - Midwest Region · Ruby-throated hummingbird (49938069306).jpg · Public domain. Cropped, gently adjusted, and resized for this guide.
“Measure the ingredients correctly, then make freshness and cleaning part of every refill.”
Backyard Birding — editorial takeaway
Leave the nectar clear
Hummingbirds do not need red liquid. Many feeders already provide visible colored parts, and flowering plants offer their own visual cues. Adding dye changes what the birds ingest without solving a problem in the recipe. The straightforward choice is clear sugar water in a suitable feeder.
Avoid adding fruit juice, drink powder, vitamins, electrolytes, protein powder, or flavor extracts. A recipe intended for a person recovering after exercise is not a recipe for a hummingbird. Similarly, do not add a preservative because you want the feeder to last unattended through a trip. The feeding schedule should fit your care capacity, rather than relying on an unverified additive to extend it.
If you accidentally prepared a colored or incorrectly mixed batch, replace it. Do not try to dilute it until it looks almost clear and call the problem solved. Remaking a small amount gives you a known starting point, whereas repeated adjustments leave you guessing about both the ingredients and the concentration.
An empty feeder is sometimes the right choice. If you have no plain sugar, no suitable water, or no time to clean the equipment, postpone the refill. Maintaining appropriate flowering plants gives birds resources that are not tied to the availability of a kitchen mixture. It also keeps the hobby from becoming a pressure to improvise whenever supplies run low.
The same rule applies when comparing commercial products: examine what is actually supplied and whether it requires dilution. Do not assume that a clear bottled product uses the same concentration as your homemade batch, or pour a concentrate into a reservoir as though it were ready to use.
Make the refrigerator part of the plan
Refrigerate extra nectar promptly in a clean, covered, food-safe container. The Smithsonian gives one week as an upper storage limit. Treat that as a ceiling under suitable storage conditions, not a target to reach regardless of what happened to the container. Label the preparation date and discard a questionable batch rather than trying to recover it.
A smaller batch often works better than long storage. If you fill one modest feeder, making enough for only the next few changes reduces the number of times you open the same container. It also gives you less unused liquid to discard when the weather or visitation changes. The ideal batch size is related to your actual routine, not the largest jar in the cupboard.
Keep refrigerated nectar separate from a bottle used to collect old feeder liquid. Never return leftovers from outdoors to the clean stored supply. Pouring them back would mix material exposed to feeding ports, insects, weather, and handling with the portion you were trying to keep clean.
Do not judge a batch solely by whether it still looks transparent. Visible cloudiness, unexpected particles, mold, or an unusual smell are clear reasons to discard it, but their absence is not permission to ignore time and handling history. When the date is missing, the refrigerator failed, or you cannot remember whether the container was clean, make a fresh batch.
Use a distinctive label and a sensible shelf position so nobody mistakes it for lemonade or a cooking ingredient. A simple kitchen system should remain understandable to everyone who shares the refrigerator, including someone who has never filled the feeder before.
Separate storage life from feeder life
A covered refrigerated jar and an outdoor feeder are different environments. Nectar outside is exposed to warm air, sunlight, bird visits, insects, and the surfaces of the feeder. A storage limit cannot be transferred directly to the time a filled feeder may hang outdoors.
Use a regular cleaning and replacement schedule, then shorten it when conditions demand. The Smithsonian's main recipe directions recommend changing and thoroughly cleaning feeders every other day. In hot conditions, inspect daily and be prepared to replace nectar more often. Our nectar replacement guide explains how to build a schedule around heat, exposure, and actual contamination.
Take immediate action when nectar turns cloudy, mold appears, insects accumulate, or the ports become soiled. Empty the feeder, clean all accessible parts, rinse properly, and start again with fresh liquid. Adding new nectar on top of old liquid does not reset the feeder. Neither does shaking a bottle until settled material disappears from view.
Fill less when birds are visiting lightly. A large reservoir only creates an illusion of convenience if most of its contents need to be discarded at the next cleaning. A quarter-filled feeder can be a better match for a quiet yard than a full one, provided the feeder's design works correctly at that level.
Set a reminder that names the complete job: empty, clean, refill, inspect. A reminder saying only refill encourages topping up. If several people care for the station, leave a visible note after each change so nobody assumes someone else cleaned it. Shared responsibility works best when the last completed action is clear.
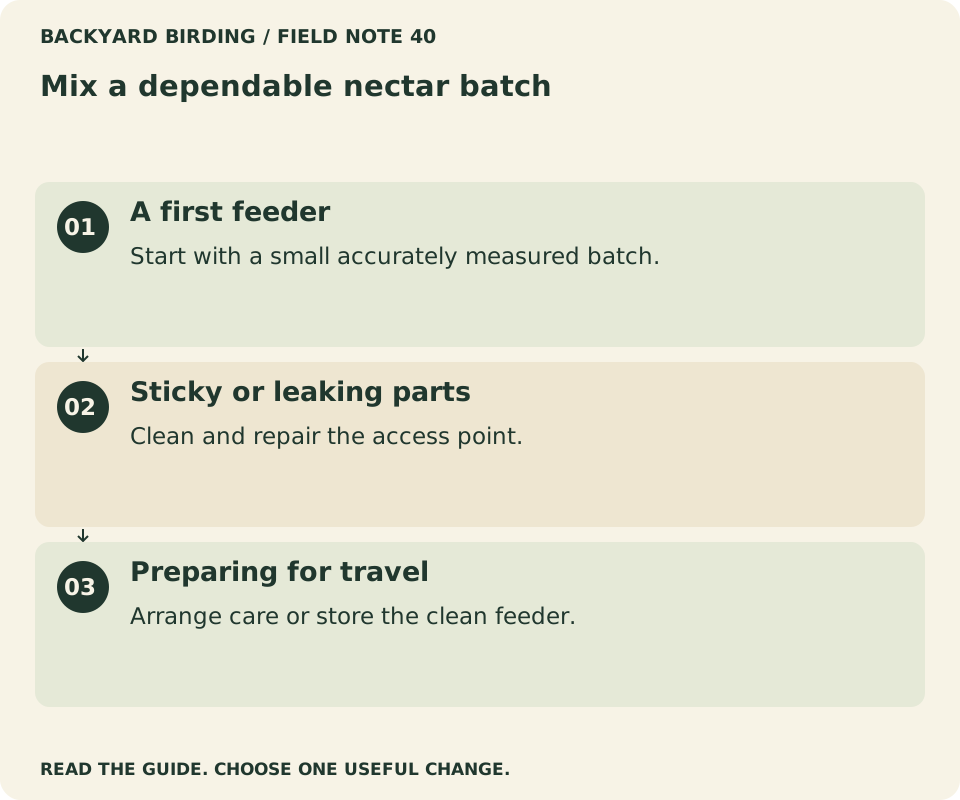
Find your situation

Read the visual as text
- A first feeder. Start with a small accurately measured batch.
- Sticky or leaking parts. Clean and repair the access point.
- Preparing for travel. Arrange care or store the clean feeder.
Keep spills and leaks from becoming the main food source
A sticky feeder exterior can attract insects even when its drinking ports have guards. Start troubleshooting at the place nectar becomes accessible. Look beneath the reservoir, around threaded joins, along gaskets, and below the mounting point. A hanging drop tells you more about a leak than the apparent volume missing from the bottle.
Remove the feeder before inspecting parts closely. Empty it into an appropriate drain, wash the exterior, and reassemble according to the manufacturer's instructions. Check for a distorted seal, a cross-threaded connection, a cracked reservoir, or a lid that is not seated evenly. Do not repair a food-contact joint with an adhesive unless it is explicitly appropriate for that purpose and use.
Check that the feeder hangs level and does not swing into a branch or wall. Review whether its location exposes it to repeated bumps or strong sun. A change in position may help you understand the problem, but use the feeder's own care guidance before making assumptions about how its reservoir handles temperature and pressure.
Do not smear oil, petroleum jelly, or insecticide around the ports. Cornell's guidance on hummingbird feeder visits warns against oily or sticky substances that can contaminate nectar or feathers. Mechanical access controls and clean surfaces are a better starting point.
If insects remain the main concern after leaks are fixed, use our guide to bees and wasps at hummingbird feeders. A nectar recipe and an insect-access problem require different decisions; making the mixture stronger or weaker is not a dependable repair for a leaking feeder.
Put the feeder where you can maintain it
A good recipe is useful only if you can safely reach the feeder when it needs attention. Choose a stable mounting point at a comfortable working height. Carry an empty feeder to the proposed spot first and rehearse removal and replacement. If the process requires leaning out of a window or balancing on furniture, choose another location.
Check nearby glass from outside. Reflected vegetation and open-looking passages can create collision hazards independently of how appealing the feeder looks from your kitchen. Use our window-collision prevention guide to assess and treat hazardous panes. Moving a feeder a little does not by itself make a reflective wall safe.
Consider the changing sun across the day, access after rain, and the path you use while carrying liquid. A sheltered, shaded position may make inspection more comfortable, but leaves and branches should not block cleaning access or rub against the feeder. Think about pets and regular household activity as well as your preferred viewing angle.
A single feeder is enough to learn the routine. If you later add another, put its care requirements on the same schedule. Two locations can offer birds different approaches, but they also create twice as many reservoirs and port assemblies to inspect. Add equipment because it solves a clear access or observation problem, not simply because birds are absent on one afternoon.
Measure success first by what you control: fresh liquid, clean ports, secure mounting, and safer surroundings. The number of hummingbirds depends on range, season, habitat, and individual behavior. A well-maintained feeder can be worthwhile without producing a constant stream of visitors.
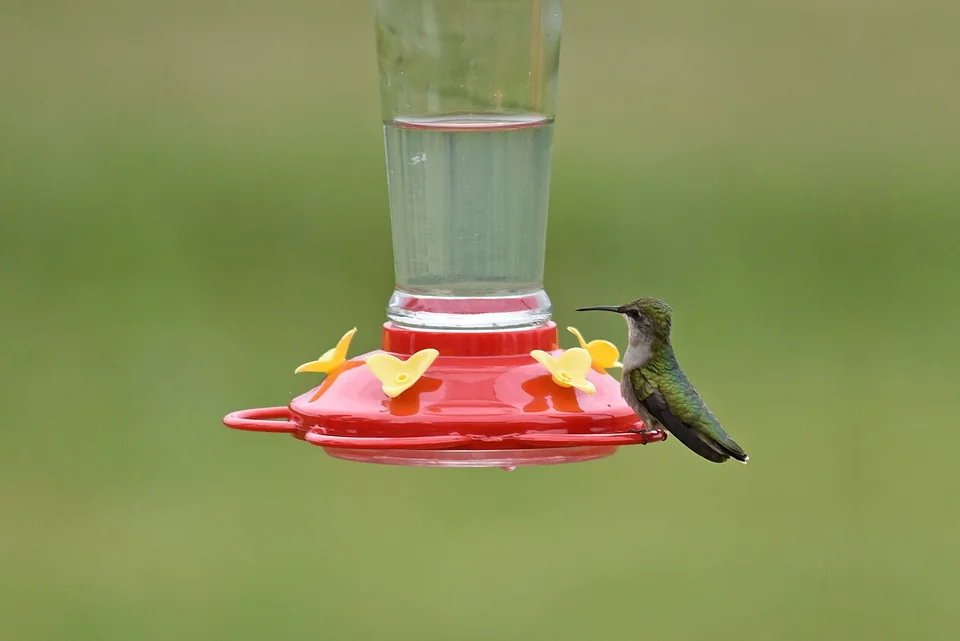
Photo: U.S. Fish and Wildlife Service - Midwest Region · Ruby-throated hummingbird (50036621428).jpg · Public domain. Cropped, gently adjusted, and resized for this guide.
What sugar water supplies and what it leaves out
Sugar water offers accessible energy. It is not a complete diet. Hummingbirds also consume small arthropods, and their natural feeding includes visits to flowers. A backyard that supports both flowers and insects offers opportunities that a reservoir of sweet liquid cannot duplicate.
This distinction matters when deciding how to spend time and money. After obtaining a feeder you can clean, consider adding suitable native plants rather than buying several larger reservoirs. Choose plants for your region, site conditions, and flowering season. A useful planting sequence can provide blooms over a longer period than one spectacular plant that flowers briefly.
Avoid broad claims that every red tubular flower is equally valuable everywhere. Check whether a plant belongs in your area, how large it becomes, and whether it will fit near paths, utilities, or a small patio. Our native-plant planning guide starts with local fit rather than a national shopping list.
Leave room to observe how birds use the whole garden. They may take nectar from flowers while ignoring a feeder for part of the day. That does not mean the recipe has failed. A change in feeder visits can reflect activity elsewhere, including natural food availability and breeding behavior, rather than dissatisfaction with the sugar mixture.
Do not respond by adding protein supplements to nectar or attempting to supply a complete homemade bird diet. Improve the habitat and maintain the simple feeder routine. If a bird appears weak or injured, seek qualified wildlife advice; ordinary backyard feeding instructions are not rehabilitation instructions, and a sugar-water syringe is not a substitute for trained care.
Adjust the amount through the seasons
Keep the standard recipe consistent while adjusting the volume you offer. A quiet early-season feeder may need only a small fill. Later, more visitors can justify preparing more nectar, provided cleaning remains equally dependable. Increasing the quantity is a response to observations, not a calendar requirement.
Use local species and arrival information to decide when to begin. The United States does not have one hummingbird season: species, latitude, elevation, and regional conditions differ. Our feeder timing guide explains how to use local observations without treating a national date as a promise.
When visits slow, reduce the next fill before changing the recipe or moving every feeder. Spend time watching flowers and nearby perches. Keep a short record of actual sightings, refill dates, and weather. An empty feeder in the evening is an incomplete observation unless you also know whether it leaked or attracted other animals.
In autumn, maintaining a clean feeder does not force hummingbirds to remain instead of migrating. Continue only while you can care for it properly. If you are leaving home, arrange a capable caretaker or remove, clean, and store the feeder; do not leave a large batch outdoors as a substitute for attention.
Where winter hummingbirds occur, local conditions call for a more specific plan for freezing weather and equipment. Follow reliable regional guidance and use purpose-made equipment only as intended. Do not add alcohol, antifreeze, or another chemical to keep nectar liquid. Seasonal care may become more demanding, but the response should never be an improvised additive in the birds' food.
Troubleshoot the result before changing the formula
When something looks wrong, identify the observation precisely. Is the liquid cloudy, the feeder empty, the exterior sticky, or the reservoir untouched? Those are different problems. Changing the sugar concentration in response to all four would hide the evidence rather than explain it.
| What you notice | First check | Useful response |
|---|---|---|
| Undissolved crystals in the jug | Measurements and mixing | Verify the recipe and stir fully |
| Cloudy nectar or visible growth | Time, cleanliness, and heat | Discard, clean, and replace |
| Reservoir empties without observed visits | Seals, cracks, and drips | Inspect the feeder before refilling |
| Insects cover the outside | Spills and exposed nectar | Clean surfaces and review access |
| Fresh nectar remains unused | Local birds, season, and placement | Offer less and observe patiently |
| Nobody remembers the mixing date | Label and storage history | Make a small known batch |
Use one change at a time when the issue is visitation. If you move the feeder, replace its design, alter the fill level, and change observation hours together, the next result will be difficult to interpret. A simple backyard journal makes a useful place to record what changed.
There is no need to keep a failing experiment running when nectar is spoiled or equipment leaks. Those conditions need immediate correction. Patience applies to waiting for birds and learning local patterns; it does not mean leaving questionable food outdoors to see whether a bird eventually drinks it.
After the basic checks, an apparently quiet feeder can remain a quiet feeder. Hummingbirds are free-living animals. Your role is to make the offering appropriate, accessible, and clean, not to engineer a guaranteed number of daily visits.
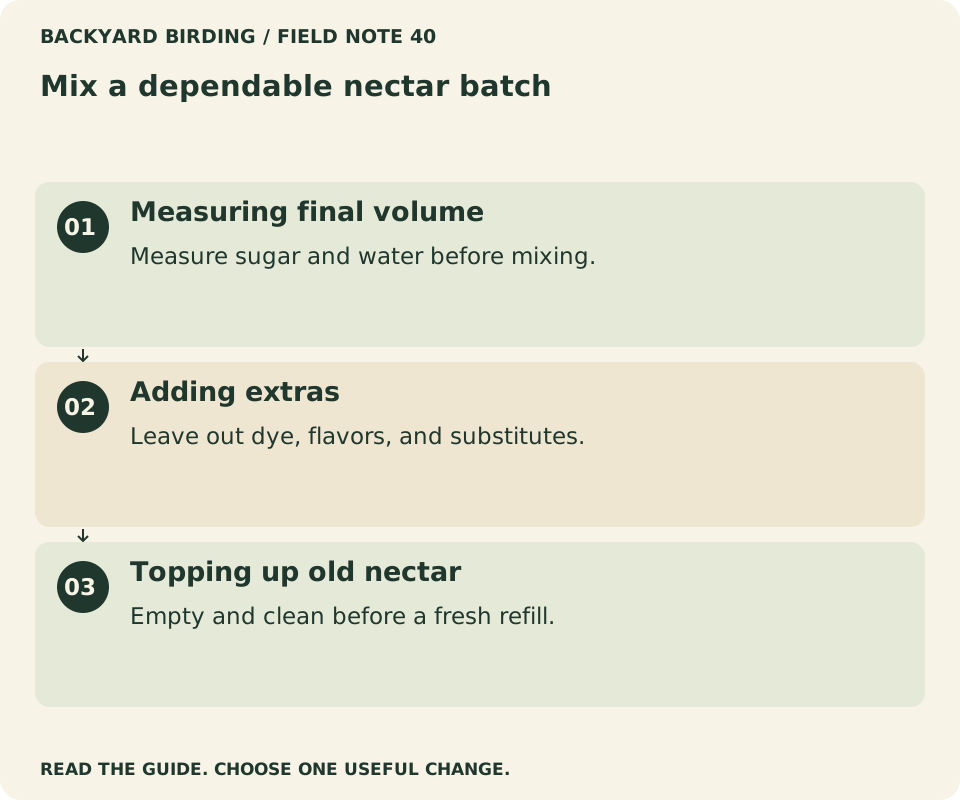
Small mistakes. Better moves.

Read the visual as text
- Measuring final volume. Measure sugar and water before mixing.
- Adding extras. Leave out dye, flavors, and substitutes.
- Topping up old nectar. Empty and clean before a fresh refill.
Set up a routine another person can follow
A reliable feeding station should survive a change of caretaker without requiring a long verbal explanation. Leave the recipe, cleaning instructions, supply locations, and last-change date together. Include a photograph of the correctly assembled feeder if its seals or base are easy to reverse.
Write the preparation instruction as actual quantities: one quarter cup of refined white sugar plus one cup of water. A note that says use the normal mix is useless to someone who has never made it. State that extra nectar belongs in the labeled refrigerator container and that liquid from outdoors must never be poured back into it.
Identify the inspection points that matter for your model. A helper should know where leaks usually appear, which parts come apart, and how the feeder hangs. Show how to take it down without spilling across a walkway. Leave a clean spare container if washing and drying cannot happen immediately.
If the helper cannot sustain the schedule, taking the feeder down is a reasonable choice. Do not turn a favor into a complicated wildlife-care obligation or expect someone to recognize problems you have not explained. Native plants and natural food sources remain available beyond the feeder, and a temporary pause is preferable to neglected nectar.
When you return, inspect the whole station rather than only checking how much liquid remains. Thank the caretaker, read the notes, and resume with a clean feeder and a known batch. This makes the routine resilient to ordinary life: travel, busy workdays, changing weather, and the occasional forgotten shopping trip.
The best system is small enough to maintain and clear enough to share. Once those conditions are met, watching the birds can take more of your attention than managing the equipment.
Quick answers before your next refill
Can I make half the usual batch?
Yes. Reduce both ingredients by the same proportion. Two tablespoons of sugar with half a cup of water preserve the recipe. Do not halve only the sugar or only the water. Use measuring tools that are accurate at the smaller quantities rather than guessing at the bottom of a large jug.
Should I fill every reservoir to the top?
No. Begin with an amount suited to the interval before the next cleaning, while following any minimum-fill instructions for the feeder. More stored liquid outdoors does not mean less cleaning. If you regularly discard most of it, offer less next time and keep the care schedule.
Is boiling a way to skip cleaning?
No. Heating during preparation does not protect the feeder indefinitely once birds, insects, and outdoor surfaces contact the liquid. Treat mixing and feeder maintenance as separate jobs. The first establishes the recipe; the second keeps the actual feeding station in acceptable condition.
What if I added the wrong amount of sugar?
If you know the exact quantities, you can calculate a correction before the mixture reaches the feeder. If you are unsure what went in, discard it and remake a small batch. A fresh, measured start is easier to trust than several uncertain adjustments.
What should I do today?
Choose one small measurement from the table, assemble clean equipment, and make a clear batch with the standard ingredients. Fill modestly, label any refrigerated remainder, and set the next cleaning reminder. Then watch from a comfortable distance. The recipe is simple; a consistent routine is what makes it useful.
Watch it. Then try it.
Review the steps and common mistakes in two short, silent animations. Each has a complete text transcript below.
Your four-step action map
Read the complete video transcript
Mix a dependable nectar batch.
- Measure separately. Use one part white sugar and four parts water.
- Dissolve and cool. Stir fully; let a warm batch cool before use.
- Fill modestly. Pour into a clean feeder and wipe away drips.
- Record the next change. Label stored nectar and schedule cleaning.
Try the steps, then note any problem that still needs attention.
Three mistakes to avoid
Read the complete video transcript
Mix a dependable nectar batch.
- Measuring final volume. Measure sugar and water before mixing.
- Adding extras. Leave out dye, flavors, and substitutes.
- Topping up old nectar. Empty and clean before a fresh refill.
Try the steps, then note any problem that still needs attention.
Both animations use this real photograph by Jack Nevitt. Photo source · CC BY-SA 4.0. The photo is adapted into original educational animations, not recordings of a field test.
At a glance
| Option or check | Purpose | Care decision |
|---|---|---|
| 1 tablespoon sugar | 4 tablespoons water | Very small trial |
| 1/4 cup sugar | 1 cup water | Starter batch |
| 1/2 cup sugar | 2 cups water | Several modest fills |
Sources & evidence
- Smithsonian National Zoo: Hummingbird nectar recipe
- Audubon: How to make hummingbird nectar
- Cornell Lab: Feeding hummingbirds
- Cornell Lab: Understanding fewer feeder visits
Our standard: real evidence before ratings. Corrections follow our editorial process.
Our verdict & your next actions
Choose the row that describes your setup, then follow the suggested check or adjustment.
| Your situation | Our verdict | Your next action |
|---|---|---|
| A first feeder | Start with a small accurately measured batch. | Review the replacement schedule. |
| Sticky or leaking parts | Clean and repair the access point. | Troubleshoot insect access. |
| Preparing for travel | Arrange care or store the clean feeder. | Plan seasonal care. |
Your pocket field checklist
Tick off the steps as you go.
0 of 4 steps completed
Keep building your knowledge in hummingbirds, or search the full backyard library.